Camera Stand
construction notes
Instructions for fabricating a Slabsmith camera mount.
Camera Mount Essentials
A camera mount may be fabricated as a floor stand, or it may be mounted to a wall. It is NOT recommended to affix the camera mount to a ceiling. Ceilings always move.
The most common style of camera mount, is a floor mounted stand. A floor mounted stand is also the recommended method as it is less likely to suffer from external vibrations.
Floor Mounted
Adjustable Height Camera Stand
Important considerations
The stand must be rigid
- Even minor vibrations in the camera stand will be a problem when taking a picture.
- A floor mounted stand is the preferred camera mount to prevent vibrations.
- Do Not attach the stand to a desk, avoid anything touching the camera stand.
- Do Not assume that this design is overbuilt. It needs to be this strong. Very small movements of the camera result in large movements at the A-frame.
The stand must be adjustable in height
- The camera height should allow the camera to be be perpendicular to the a-frame.
- The height will vary depending on the angle of the A-frame and the distance between the camera and the A-frame.
- After the camera height is established (after the first calibration) you may tack weld the joint between the main upright and the extention to provide additional rigitity.
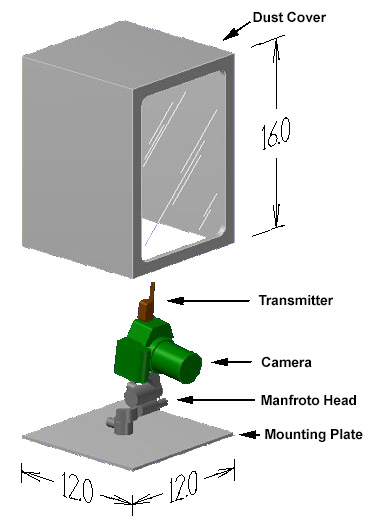
The camera head
- The camera head is the adjustable unit between the flat top plate on the stand and the camera ( the grey unit in the picture). It is a Manfrotto Jr. camera head which you can purchase here.
- Do not substite a lighter head unit. This unit has proven to be dependable.
- To attach the camera head to the 1/4″ top plate, you will need to drill a hole to accept a 1/4 by 20 bolt. You will need a spacer (bushing) between the top plate and the camera head to allow the bottom knob of the camera head to be adjusted.
- The top plate should be welded to the upright so that most of it is in front of the upright, to allow room for the camera to be completely inside the top plate when mounted to the camera head.
Moisture and Dust protection cover
- The camera must be covered to prevent excess dust and moisture, and also to discourage people from touching the camera.
- The dust cover should be easy to remove to get full access to the camera when needed.
- It does not have to be more complicated than a box that rests on the mounting plate, with a clear panel on one side.
Construction materials (base)
1 – 12″x 12″ x .25″ steel plate for the base.
1 – 4″ x 4″ x 72″ .25″ thick steel square stock for the base upright, with a set screw near the top
1 – 3″ x 3″ x 60″ .25″ thick steel square stock for the insert (slides inside the 4″ piece)
1 – 12″ x 12″x .25″ plate for the top mount
Note!– If you want the camera stand to be extra sturdy, make the bottom plate 16″x 16″ and add some braces from the base to the upright.

Dust cover box detail
Important considerations
General
- Before constructing the box, verify the height by mounting the camera on the mouting plate and placing the flash transmitter on the top of the camera and measuring from the plate to the top of the transmitter.
- The Manfrotto head is attached with a 1/4″ x 20 bolt through the mounting plate.
- You will need to put a ~1″ spacer between the Manfrotto head and the plate, to raise the head off of the plate and allow the bottom adjustment knob to turn.
- The clear side of the box can be safety glass, or optically clear plastic. It will need to be cleaned periodically, so look for scratch proof materials.
- The dust cover can be made from any material, it is primarily dust protection.
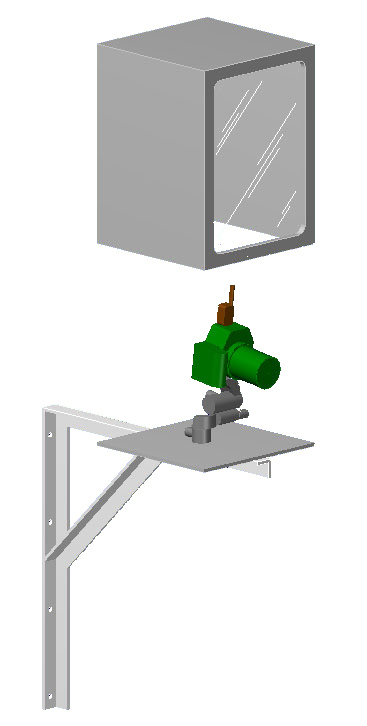
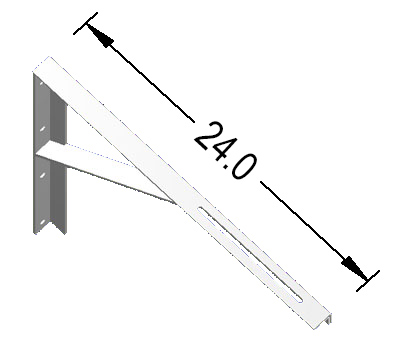
Alternative wall mount
Important considerations
Wall mounting notes
- It is recommended that you mount to a concrete wall. If you mount to a light steel beam, it will often move and/or vibrate.
- Try and keep the camera at least 12″ away from the wall to make it possible to see the back of the camera when necessary.
- For more details on the mounting system and dust cover, see “Dust cover box – detail” above.
- You will need to calculate the correct height for mounting the wall bracket by the angle of the A-frame, and distance from the camera. If you need help with this please contact us.