Slab Manager
Customization
Many parts of Slabsmith are customizable. This page is for Slab Manager customizations.
“Slab Manager” customization topics
Thumbnail tooltip
When viewing your inventory in the “Thumbnail view” a tooltip shows when you hover your mouse over any of the thumbnails that shows properties of the slab.
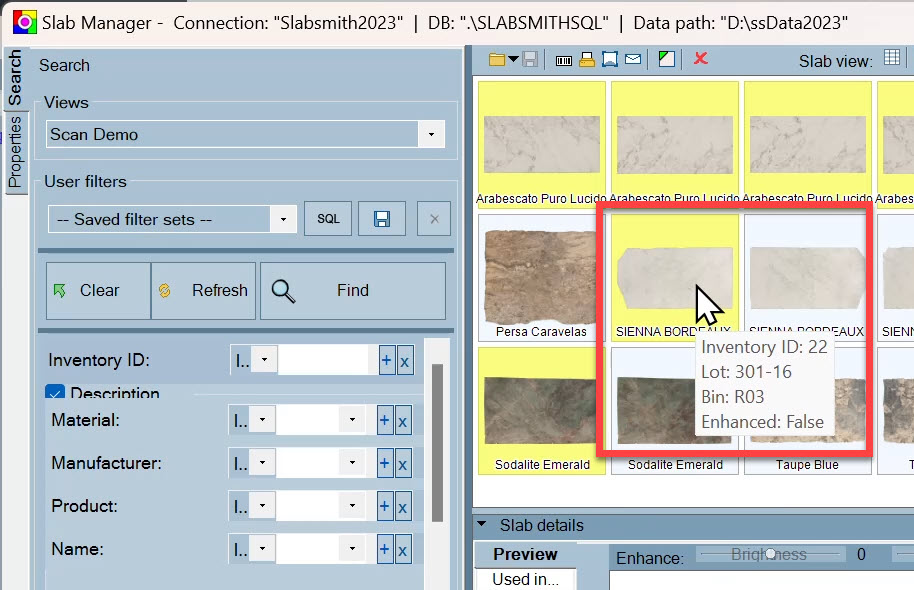
How to customize the tooltip
The tooltip is customized by modifying a special view in the Slabsmith Database Administration program.
- Start the “Slabsmith Database Administration” program
- Select the “Views” tab on the left.
- At the top of the page, in the “Slab views manager” section, select “SlabManagerTooltip (internal)” from the drop down list.
- Check all boxes for the properties you wish to see in the tooltip. (uncheck those you do not wish to see.)
- You can change the order by dragging the properties up and down in the list with the chevron on the right side of each property.
- When you have everything checked and in the correct order select the “Apply” button.
- Close the Admin program.
If you have Slab Manager open, restart it and your customized tooltip should now be working.
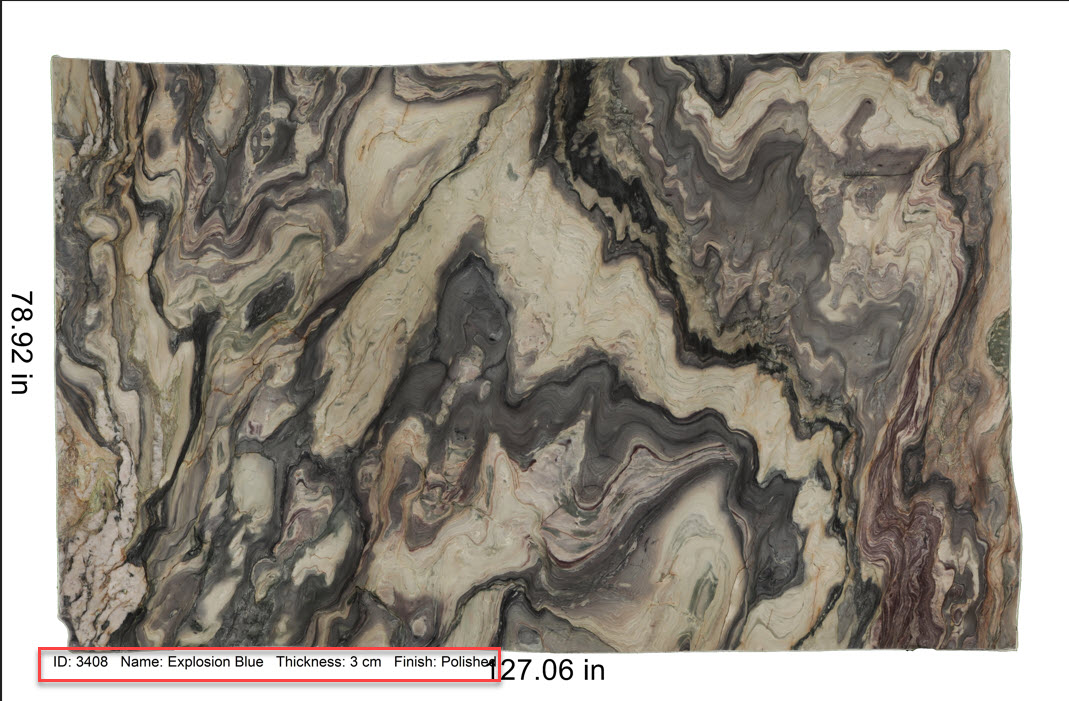
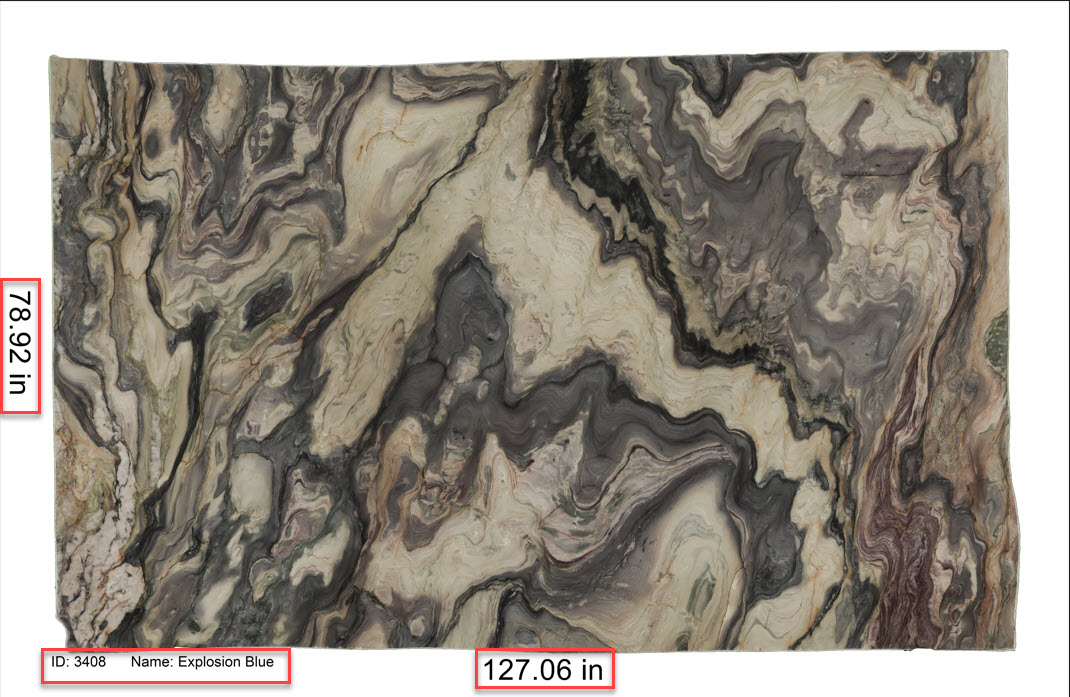
Slab JPG labels
To Export a JPG of a particular slab from Slab Manager, select the slab then click “Save slab picture as jpg” in the top toolbar:
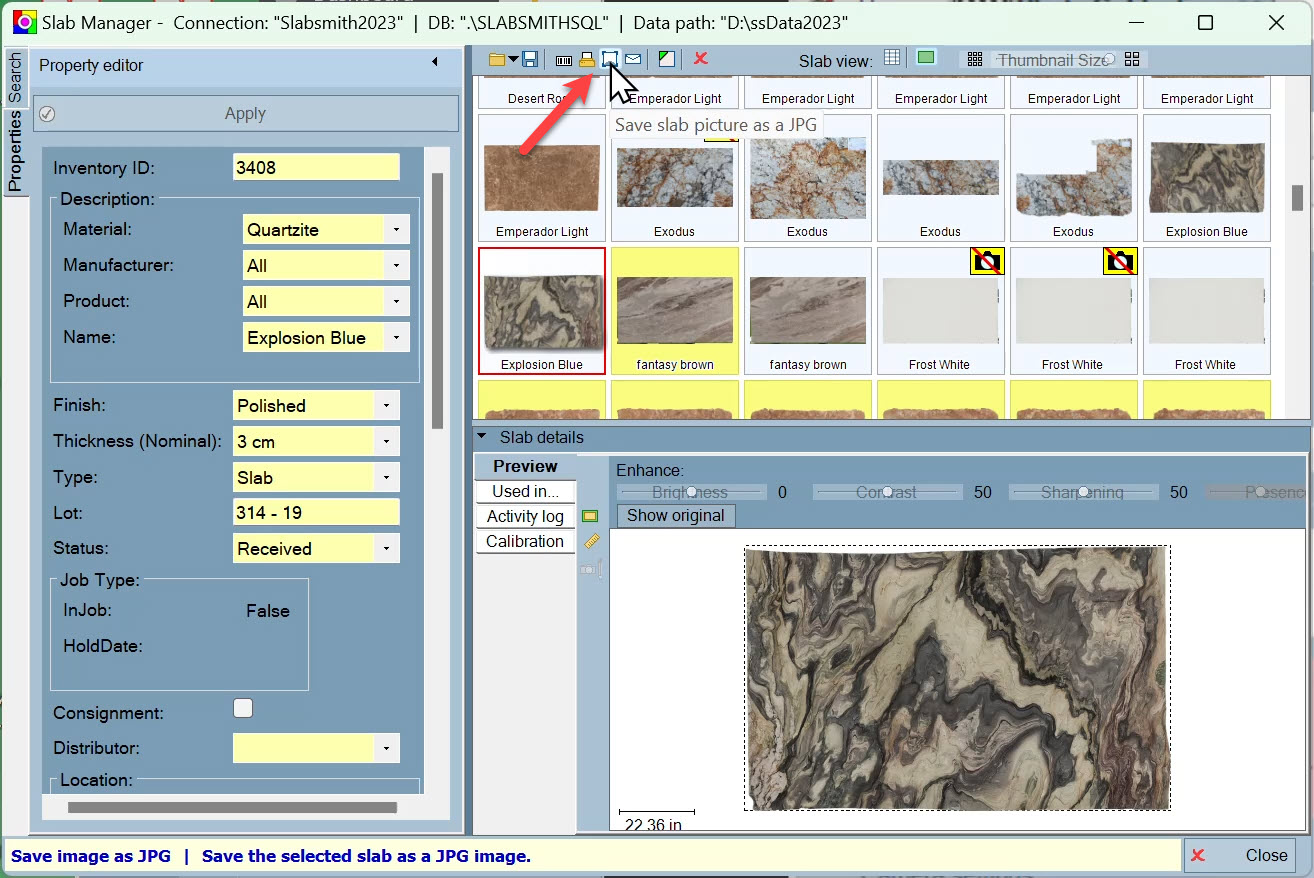
When you export a JPG from Slab Manager it adds information to the JPG which includes:
- Height and width
- Inventory ID and Material Name.
How to customize the labels
You can add any slab property to the description labels under the slab. To customize the labels:
- Open the “Slabsmith Database Administration” program.
- Select the “Scripting” tab on the left.
- Select “Image Label”.
If the window is blank, the default labels are applied (inventory ID and Name).
Example: Customizing the labels to add the materials “Nominal Thickness” and “Finish”.
To add the thickness and Finish, paste the following text in the description window:
slabLabel = “ID: ” + properties.Item.get(“InventoryID”) +
” Name: ” + properties.Item.get(“Name”) +
” Thickness: ” + properties.Item.get(“Thickness$Nominal”) +
” Finish: ” + properties.Item.get(“Finish”);
On the Admin screen it will look like this: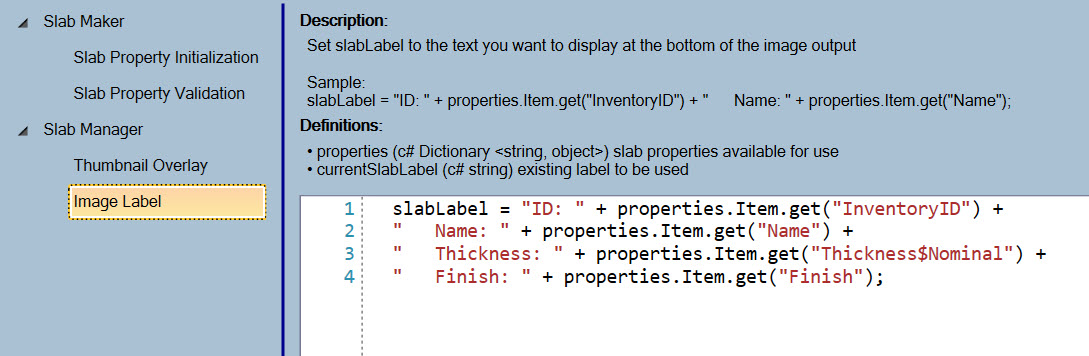
The result of this script will modify the Slab JPG to look like this: