DXF Export
Customization of the DXF file that goes to your saw
DXF Export settings
The DXF Options allow you to customize the DXF file output from Slabsmith.
To get to this section, open “Slabsmith Database Administration”, and go to the “Saws” tab on the left.
Each section of the dxf export settings is detailed below.
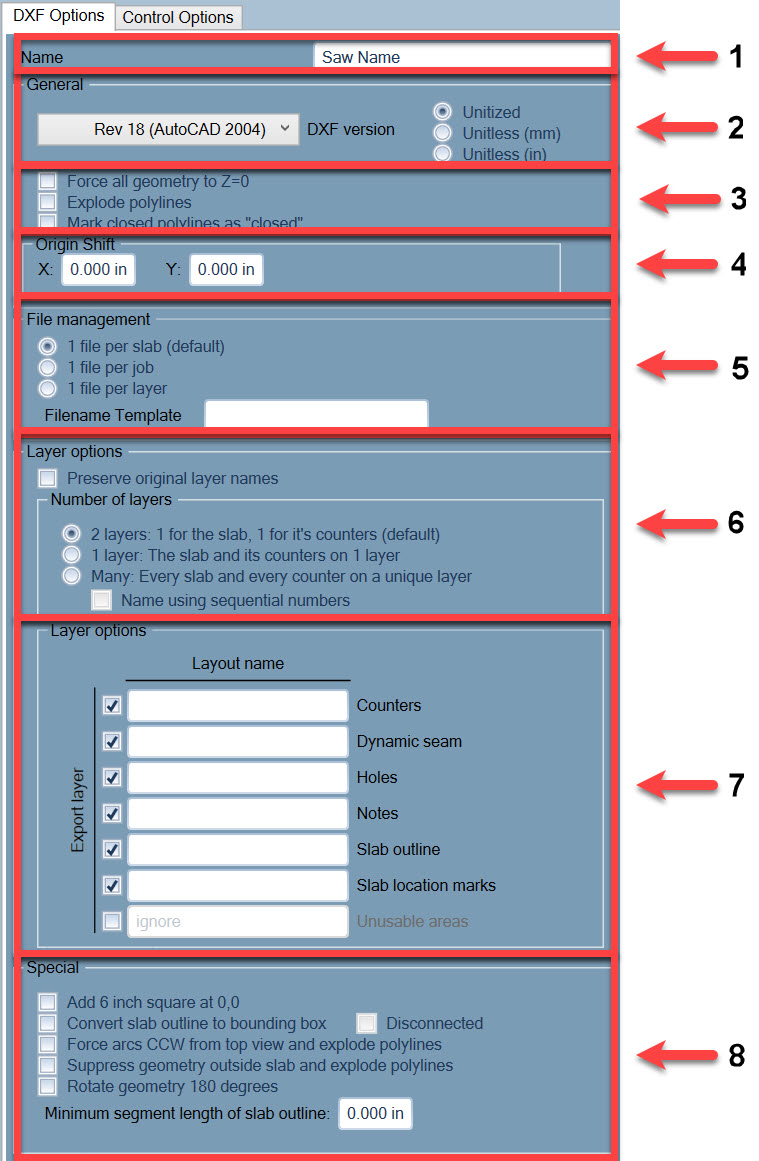
1- General (The name of the dxf export)
- The name you wish to call the export. This is typically the name of the saw but can be anything you wish.
2- General ( DXF Version and units)
- Set the version of Autocad you wish to export. By default it is Rev 18, this works well with most CAD/CAM systems.
- You can also define the export units. In most cases you should leave this to “Unitized”.
3- General ( settings)
- Force all geometry to Z zero – On export flatten all geometry to have a Z component of zero.
- Explode polylines – By default Slabsmith exports closed geometry as a polyline. If you need to maintain layer names and colors from the original file check this box. (also select “Preserve original layer names” in section 6)
- Mark closed polylines as “closed” – Some CAD/CAM systems need a flag to understand that a polyline has been closed. Check this box if your system is having trouble reading Slabsmith default polylines.
4- General (Origin Shift)
- This is ONLY for shifting the DXF file by a specified amount. It should not be used to adjust the 0,0 position of your calibration. The primary use of this is to allow for different zero positions on different saws. In this case you would treat one saw as the master and make an export for it. Then make a second export for the second saw with the difference between the saws origins as a shift. Each saw would then have it’s own export.
5- File management
- “1 file per slab”. In most cases this is the setting you will want to use. This exports a DXF file for each slab which includes the slab outline, the individual parts of the layout and the remnants.
- “1 file per job”. This will export all the slabs from the job into a single file with each slab on it’s own layer (level).
- “1 file per layer”. This will export a file for each layer in the original template.
- Filename Template. This allows you to customize the name of the file that is exported. For a complete description of this customization Click Here.
6- Layer Options (Number of layers)
- Preserve original layer names. When checked this will maintain the original colors and layers in your template when the Slabsmith file is exported. If you need to do this you should check this and also “Explode polylines” in section 3 above.
- Number of Layers
- 2 layers: 1 for the slab, 1 for it’s counters. In most cases this is the best options and is also the default.
- 1 layer: The slab and it’s counters on 1 layer. Uncommon
- Many: Every slab and every counter on a unique layer. Uncommon
- Name using sequential numbers. When “Many” is selected this will cause each layer to be sequentially numbered.
- NOTE: These behaviours are overridden if you select “Preserve original layer names”.
7- Layer Options (layer options)
- Checkboxes. The checkboxes determine if geometry on the selected layer will be exported. If you do not want a specific layer exported, uncheck the box.
- Layout name. Type the name of the layer you would like for each type of export geometry.
8- Special (Special functions which may have been included for a specific saw and software)
- Add 6 inch square at 0,0. This will add a 6in (150mm) square to the export with it’s lower left corner at X0Y0. This was added to prevent some sofware from moving the layout to the saw softwares origin. It is currently rarely used.
- Convert slab outline to a bounding box. This will reduce the slab outline to a simple rectangle with 4 lines. It will be the smallest rectangle that completely encloses the slab boundary. This is useful if your saw software has trouble with complex slab outlines.
- Disconnected checkbox. This explodes the bounding box polyline.
- Force arcs CCW from top view and explode polylines. This will make sure all arcs are drawn Counter-Clockwise.
- Suppress geometry outside slab and explode polylines. If there is a line or arc outside of the slab it will not be exported.
- Rotate Geometry 180 degrees. This can be useful for a saw with a left-handed co-ordinate system.
- Minimum segment length of slab outline. This reduces the complexity of a slab outline by limiting the size of the shortest lines used to represent the slab boundary. The larger the value, the less accurately the exported slab outline will follow the actual outline.
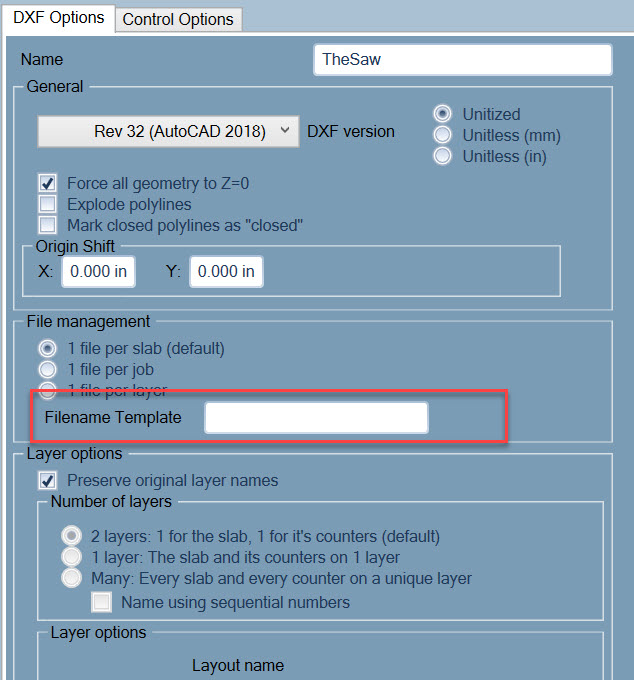
DXF Path and Filename
You can change the filename of the DXF file exported from Perfect Match using the Filename Template in the database administration program. (see the screen shot below.)
If you don’t customize the filename it will be named as “Machine name_Job ID_Slab ID.dxf”
There 4 variables that can be used to name the file during export:
- Filename %f Add what you type in the save dialog to the dxf filename.
- Slab ID %s The Inventory ID of the slab.
- Job ID %j The Job ID
- Machine name %m The name of the dxf export in the admin (often the name of the saw)
Each variable can be separated by almost any characters or combination of characters and spaces.
Examples where Job ID = “324”, Slab ID = “5607” and dxf export name = “MySaw”
| Manual input | Filename Template | Resulting filename |
| MrJones | %f_-%m-%j_%s | MrJones-MySaw-324_5607.dxf |
| MrJones | %j_%s-%f | 324_5607-MrJones.dxf |
| %j-%s | 324-5607.dxf | |
| More complex examples | ||
| Smith Vanity | (%f)-%j_%s | (Smith Vanity)-324_5607.dxf |
| Smith Vanity | (Smith Vanity) Job#%j Slab#%s Machine-%m | (Smith Vanity) Job#324 Slab#5607 Machine-MySaw.dxf |
You can also force the file to be saved to a particular folder by staring the customization string with a pathname.
For instance :”C:\MyFolder\DXF\%j_%s”.
DXF Settings for your saw
Common DXF export settings for specific saws can be found below. You may need to further customize or change these settings for your own purposes, but these represent good starting points.
You can adjust the DXF export settings in the Slabsmith™ Database Administration program, in the “Saws” tab.
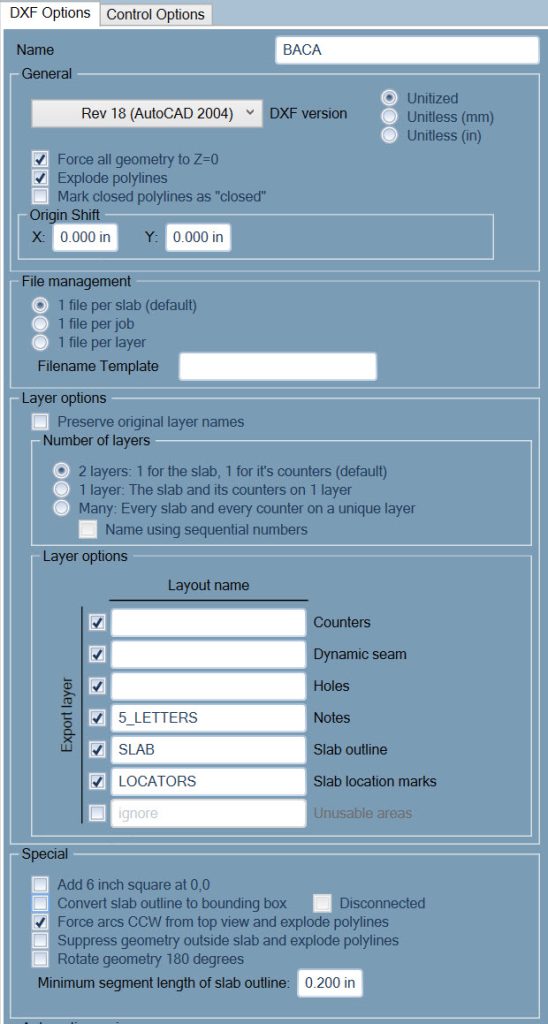
BACA
DDX Easy Stone (settings for Automatic CAM configuration)

Donatoni

GMM
![]()
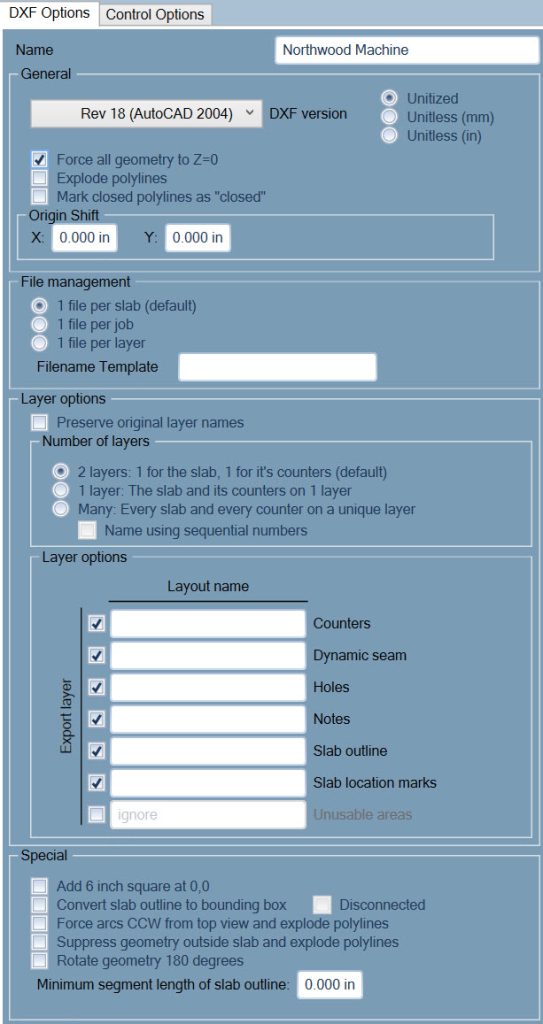
Northwood Machine
Park

Poseidon
![]()
Prussiani

Sasso
![]()